{Basement Craft Room} Back Wall Storage

Happy Thursday!

I shared the image below on Instagram (follow along at thebrickbungalow) on Wednesday. It's slightly changed since then as some of the pictures are now hanging on the wall but before I finish completely, I thought I'd update the blog with the progress shots. 


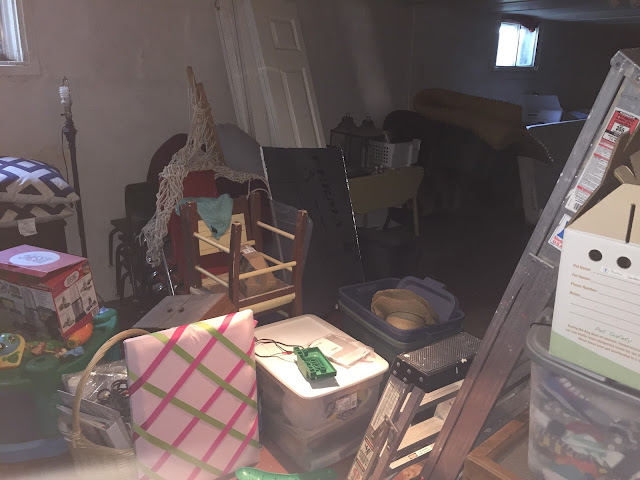
This is the back wall that I've taken a few progress photos of. Behind the framed images (see below), there is a closet. It will eventually get some work done on it but for now let's pretend it's just a wall. It is one of three pass throughs to the other side of the basement… if you're a cat… meaning I need to block it off from a certain black cat. 


Here it was before I spent the entire morning yesterday bringing down items from my upstairs office. The little table on the left will get painted as it was just a cheap auction buy. The table on the right is in perfect condition, an antique (I believe from my aunt) and the top can open to double the workspace. It'll be my little sewing area for now. Meaning it'll hold my sewing supplies as I actually suck at it. 


And here it was when I moved the black shelves down. They were being used elsewhere in the house and I was able to steal them away. Ideally, I'd love a wall of built ins but this isn't the type of house that will get those (meaning there could be moisture issues still so I'm going cheap and functional for now). 


Just to remember… here it was before anything. 


And then before anything got painted…. 


The photo above shows our broken lights. We did find out they work so now to find some nice, flush mount lighting options that won't break the bank!!! I'm all for doing this space as frugal as possible… this momma still needs to enjoy summer and have money for vacation! 

Hope your week is going well. What are you up to?? 


{The Farm} Blueberries and Birthday Cake

Hello!

Can you see the frog?? It's in a metal fish my mom has hanging from a trellis. It's been dry and hot lately, so he's hanging out in the shade. And pretty camouflaged! 

I have a whole series of pictures of my dad and Lily eating blueberries together so when this opportunity presented itself, I couldn't help but take photos. 


And yes, he's bottomless and barefoot. He needed help across the rocks. I'm not sure where his diaper went to but he knows he can pee outside at the farm (getting him to understand that its ok there vs other places is an issue). 


And a collage of cuteness as he shoves his tired face with blueberries. Never a dull moment with this kid! 


And not to forget big sis. She's the brave soul that tried out the pool. It was a little cold for the rest of us but she loved it. It's since warmed up and we've swam a few times. 


Also going on at the farm was my mom's birthday. We celebrated with a swim and some of their close friends (who are more like family than friends really) and I made carrot cake with cream cheese frosting. I also made a grasshopper pie and a jello salad but only photographed the cake. Nate thought it was his and kept poking it. It's a good thing he's cute. 


So good that it involves both hands! 


{Front Door} Welcome!

Hello friends!!! I've recently changed out my wreath decor and I also repainted our mailbox (again and again). You can see the original makeover here in its original sad state and when I brightened it up with yellow paint). The yellow, and then the turquoise, were all a little bright to me so I went with a classic black. Ideally, we'd replace the mailbox with some awesome, art deco (possibly) type but that just hasn't been in the budget. Or even the top of the to do list, so paint it is!


I also changed up the wreath. I guess you can say I try to stay up to date with the seasons but's really just Spring, Summer, Fall (Halloween) and then Christmas around here. Maybe some day I'll do others. Maybe. 

The black and white ribbon was on there for awhile and I kept it because it ties into the address plaque and our mailbox. The star garland lights up and is from Target's dollar spot (although I think it was actually $3). I already had the welcome sign from years ago but I believe it originally came from Hobby Lobby. It helps hide the battery pack for the lights. 


The original wood door wasn't always this pretty. Check out the messy process to get it so pretty here. I also painted the black trim and you can see it here.  

What do you think? Do you decorate for the holidays or seasons? Are you a big burlap or wreath fan? 
{Basement} Inspiration and Where We're At

Hello! 

Let's talk about the basement, ok? I've moved items, thrown things away, donated, sold and who knows what else with some of the stuff that was in the basement. I then cleaned, scrubbed, primed and painted the walls and ceiling. The floor was then painted as well, to cover up the paint stain that was not helping with the light and bright part of my wish list. It is a TON better but it's no where near done. 

Here's my inspiration: Classy Clutter's Basement Craft Room


Isn't that amazing?!? 

Here's where I started from. This room was truly a dumping ground for everything. Old kids' toys, items we weren't using, things we were holding on to, just random stuff. No man's land basically. We then tried to block the majority of it off from a certain black cat as he thought it was his litter box. Yes, disgusting. 


It was so dark. Two small windows, hardly any lighting (it's all broken anyway but can hopefully be fixed), and an exterior door that leads to the walk out underneath our back porch. 

Then it looked like this after some purging. 


Here it is cleaned out. The interior walls have the paper bag treatment on them. I chose to paint over them instead of seeing what's underneath. I knew it wasn't going to be smooth drywall, so I took my chances. 


And after one coat on the back. That may have been primer actually, I can't remember. 


Same wall. Sorry for the inconsistency with angles, but you get the idea. The walls and ceiling are done (the dark line in the corner is the paper bag treatment curling… we'll deal with that later) and the floor hadn't been cut in (I was too excited to do that first but it's since been done). 


{Basement} Floor Paint

Hello!

I'm back with a basement post! I hope that within a week or two, I will have a post about it being done. I went to put the second coat of paint on and it wasn't ready yet, so that'll be tomorrow's job. Or late tonight possibly.

But check it out! 

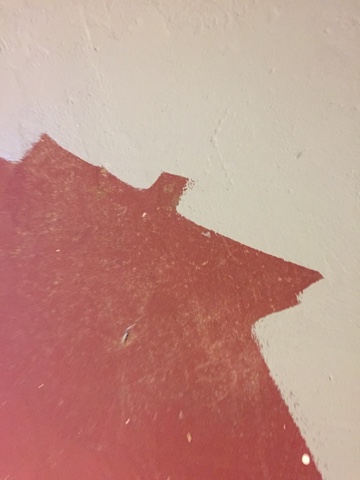
The red was a stain the previous homeowner used on both the basement floor (just on this side thankfully) and our front porch's floor. Both will be dealt with and I believe in the same color too.

I cleaned and cleaned the floor. It was swept, vacuumed, mopped, and mopped and mopped. And mopped some more. It's a basement to a house that's right around 100 years old, give or take, and so you can only imagine what its seen.


I know the next photo is dark. The only working light is a floor lamp that is creating the glare. The overhead lights all broke and I'm honestly not sure if the electrical even works. That's an issue for another day. 


I posted this picture to Instagram (follow me at thebrickbungalow) and I love it. The paint is wet here but it does have a nice sheen to it. 


There are two windows, both look into Lily's Garden. This one is right next to the climbing hydrangea. 

I've shown this view before (here) and it looks so much better. It's not done yet though! I'm also thinking that my two shelf units (that I'm stealing from other places in my house) will go between the outlets. 


Here's the paint. I'm happy I went with the dark gray and not the light. I'm thinking the same paint color will be used for our front porch, back porch and possibly even part of the backyard shed makeover. The shed may go light gray but I'll test this color out first. 


So what do you think??? Here's where we started… 


{Lily's Garden} Progress

Happy Wednesday all! 

I love showing progress photos and while I have some time, I'm trying to create some posts about them. Some day they will include the inside of my house as part of it has really come a long way. Until then, let's enjoy these three photos of Lily's Garden. 

The first was taken in May 2014 before we installed the arbor and the front bed wasn't made yet. Not to mention, the grass was still there. 2014 was a big year for this garden! 


Here it is in August 2014. Just three months later and so much change! The growth of the hydrangeas, the addition of the new bed (in front), the moon vine taking over the fence, and the rock paths instead of grass totally changed this space. Don't you agree?? The driveway is completely clear of all bricks, stones, and various other materials that have been moved around. Some came from a house that was remodeled (and since burnt to the ground), some came from my parents, and some were from our front yard but buried.


I couldn't find one from last year, but it wouldn't have been much different. 

And just recently, before the hydrangeas really took over with their show stopping blooms. 


The hydrangeas are huge, the lilies are really tall, we have a new clematis this year (bottom right) instead of the moon vine, and the containers in the front really finish up the garden. 

Now to talk to my neighbor about tackling his overgrown area in front of their fence (to the right of our garage). I'm thinking I could transplant some of my flowers as my kitchen window looks directly out at that area. 

What have you been up to? Gardening? House work? Enjoying your summer, hopefully! 

{Lily} Birthday Photos

 For seven years now, I have taken Lily to a local flower garden for her annual birthday shots. This year was a little late but better late than never, right?! And I need to soak up this time with her before she refuses. This year I also just took her instead of both her and Nate. The past two included him, and I adore both together in photos, but she needed some one-on-one time. 

Here she is staring at a squirrel. It allowed us to get really close and I bet if we had food, it would have ate out of our hands. Something we aren't used to but this park is next to a few businesses so people walk in it all the time. 


I love the bottom photo as it's been the same bench she's sat on for a few years now. I didn't post the photos from last year but here's a collage of years 1-5


I do plan on going back with both kids to get some of them together. For Nate's birthday, I took him to a local state park with a cave for his first but to a different place for his 2nd due to weather and time. I wish I had stuck with the first place, so we'll be returning there in October. 

Do you do anything for your kids' birthdays that are the same every year? I love this simple tradition and it doesn't cost anything but some time and energy. I did buy her some Orange Leaf afterwards, which was almost a waste as she would rather just have candy. But she asked, so I let her go. 

{Garden} Before and After Shots

HappyWednesday friends!!! I was on my computer this weekend and found this old shot. It's about the first "before" photo we took of what is now known as Lily's Garden. But let's imagine it without the foundation stones and that stump of a plant was more like 8 feet tall. 


 Just a bit farther down the driveway (you can't see where the rose bush used to be) but you can see all the progress!


I guess I feel the same way about this garden as some bloggers do about their home's interior. I look at this garden multiple times a day, work on it whenever I can (a lot in the summer) and truly enjoy watching things grow and trying a few different plants. I've added a few this year but I really just like watching what's here grow. That's the plus side of having a lot of perennials!

I won't ever say this garden is done but the majority is definitely done. The foundation stones aren't moving, the brick edges are done, the rock path has been in place for awhile now and the majority of plants are staying where they are. Only a few spots for annuals and my container collection still grows, but now it's just time to watch things grow!

I'm working on finding more before and after comparison shots, so make sure you come back and visit!!! 

LinkWithin

Related Posts Plugin for WordPress, Blogger...