Showing posts with label basement. Show all posts

{Basement Craft Room} Back Wall Storage

Happy Thursday!

I shared the image below on Instagram (follow along at thebrickbungalow) on Wednesday. It's slightly changed since then as some of the pictures are now hanging on the wall but before I finish completely, I thought I'd update the blog with the progress shots. 


This is the back wall that I've taken a few progress photos of. Behind the framed images (see below), there is a closet. It will eventually get some work done on it but for now let's pretend it's just a wall. It is one of three pass throughs to the other side of the basement… if you're a cat… meaning I need to block it off from a certain black cat. 


Here it was before I spent the entire morning yesterday bringing down items from my upstairs office. The little table on the left will get painted as it was just a cheap auction buy. The table on the right is in perfect condition, an antique (I believe from my aunt) and the top can open to double the workspace. It'll be my little sewing area for now. Meaning it'll hold my sewing supplies as I actually suck at it. 


And here it was when I moved the black shelves down. They were being used elsewhere in the house and I was able to steal them away. Ideally, I'd love a wall of built ins but this isn't the type of house that will get those (meaning there could be moisture issues still so I'm going cheap and functional for now). 


Just to remember… here it was before anything. 


And then before anything got painted…. 


The photo above shows our broken lights. We did find out they work so now to find some nice, flush mount lighting options that won't break the bank!!! I'm all for doing this space as frugal as possible… this momma still needs to enjoy summer and have money for vacation! 

Hope your week is going well. What are you up to?? 


{Basement} Inspiration and Where We're At

Hello! 

Let's talk about the basement, ok? I've moved items, thrown things away, donated, sold and who knows what else with some of the stuff that was in the basement. I then cleaned, scrubbed, primed and painted the walls and ceiling. The floor was then painted as well, to cover up the paint stain that was not helping with the light and bright part of my wish list. It is a TON better but it's no where near done. 

Here's my inspiration: Classy Clutter's Basement Craft Room


Isn't that amazing?!? 

Here's where I started from. This room was truly a dumping ground for everything. Old kids' toys, items we weren't using, things we were holding on to, just random stuff. No man's land basically. We then tried to block the majority of it off from a certain black cat as he thought it was his litter box. Yes, disgusting. 


It was so dark. Two small windows, hardly any lighting (it's all broken anyway but can hopefully be fixed), and an exterior door that leads to the walk out underneath our back porch. 

Then it looked like this after some purging. 


Here it is cleaned out. The interior walls have the paper bag treatment on them. I chose to paint over them instead of seeing what's underneath. I knew it wasn't going to be smooth drywall, so I took my chances. 


And after one coat on the back. That may have been primer actually, I can't remember. 


Same wall. Sorry for the inconsistency with angles, but you get the idea. The walls and ceiling are done (the dark line in the corner is the paper bag treatment curling… we'll deal with that later) and the floor hadn't been cut in (I was too excited to do that first but it's since been done). 


{Basement} Floor Paint

Hello!

I'm back with a basement post! I hope that within a week or two, I will have a post about it being done. I went to put the second coat of paint on and it wasn't ready yet, so that'll be tomorrow's job. Or late tonight possibly.

But check it out! 

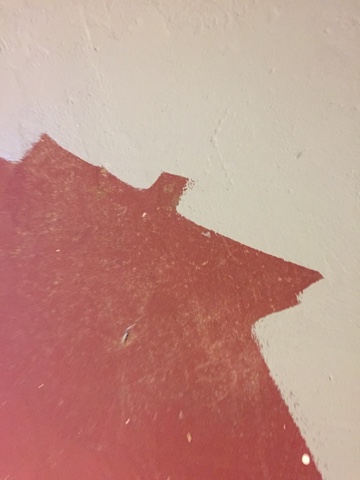
The red was a stain the previous homeowner used on both the basement floor (just on this side thankfully) and our front porch's floor. Both will be dealt with and I believe in the same color too.

I cleaned and cleaned the floor. It was swept, vacuumed, mopped, and mopped and mopped. And mopped some more. It's a basement to a house that's right around 100 years old, give or take, and so you can only imagine what its seen.


I know the next photo is dark. The only working light is a floor lamp that is creating the glare. The overhead lights all broke and I'm honestly not sure if the electrical even works. That's an issue for another day. 


I posted this picture to Instagram (follow me at thebrickbungalow) and I love it. The paint is wet here but it does have a nice sheen to it. 


There are two windows, both look into Lily's Garden. This one is right next to the climbing hydrangea. 

I've shown this view before (here) and it looks so much better. It's not done yet though! I'm also thinking that my two shelf units (that I'm stealing from other places in my house) will go between the outlets. 


Here's the paint. I'm happy I went with the dark gray and not the light. I'm thinking the same paint color will be used for our front porch, back porch and possibly even part of the backyard shed makeover. The shed may go light gray but I'll test this color out first. 


So what do you think??? Here's where we started… 


{Basement} Paint

So our basement is ugly. U-G-L-Y ugly. I'm sorry. Give me time. 

I mentioned I wanted to clean up and makeover our basement to a craft room. I'm thinking a mix between Meg Duerksen's and Classy Clutter's (check those babies out!) plus a bunch that are on Instagram that I love. 

We do NOT have any cuteness going on here.. I apologize. Give me time and cross your fingers, send me good vibes, pray for me - whatever your choice - I need it! 

The rest of the house is looking up and if we haven't updated it, it's just a matter of time and money (kitchen - I'm looking at you!). Some things just needed love and attention, others needed a full on gut job like our bathroom. This is a combination of both, I guess.

Cinder block walls, three broken lights (that have since been removed and donated), and a concrete floor. I guess you can say that it can only improve from here because it was just that bad.

Was. 

Here are some before - all taken with my cell phone so forgive me. I'll take better photos once we get to the pretty stuff and the sun shines again. 


Oh the ugliness - leaky something from the outside and some mold/mildew issues. Most of what you see here is actually paint I chipped off for paint prep. But yeah, there's gross stuff too. 


And here it is with primer. Let's sigh a relief on this one and think about the potential. 


And here's the other side of the basement. Two interior walls that the previous homeowner covered with brown paper bags. It's in good shape but it, with the dingy white ceilings (and other walls) and the red stained floor make it dark. And let's not forget the broken lights. 

In the phone below you can see where the trim stops… that's a closet. I may have plans for it. Maybe. 


And it's already brighter with one coat! 


Oh the ceiling. I thought it was white and then I painted it white. The old white (on the right) looks so dingy. So it'll be nice that I freshened it up. But let's not talk about cutting in for awhile, ok? The entire ceiling is covered in 45 (yes, I counted) rectangles, all surrounded with the trim. I will need a chiropractor soon (as if I didn't need to go see one already). 


And a little before and after comparison I put on Instagram. Follow me at thebrickbungalow


The plans still are: 
1. Paint - I'll say I'm 1/3 of the way - maybe. 
2. Storage
3. Tables and workspace
4. Lighting
5. A studio name

I hope to have more updates soon. I got farther along than what I've shown here, but ran through one gallon of paint already (plus the primer), so I'll show more later. I needed to stop to do everyone's favorite activity - taxes! So now that those are done with, I'll go back to painting tomorrow. And then cleaning the rest of the house. I'm on Spring Break and well, it's now halfway over but I have so much to do! 

What have you been working on? 

Some day our weather will stay constant and the sun will come out and I'll do an early garden tour. I need to stay on top of those this summer so I can show the wild growth that happens in Lily's Garden. 

Mission Organization


Ahh, organization. What a wonderful concept and something I'd love for my whole house to be some day. It's on its way there... slowly but surely.

Our basement, where this picture was taken, has two sections. One is what I would LOVE to redo some day for a nice entertainment room - TV, sectional, round table with chairs (game table/poker, etc) and even a bar area with a fridge and microwave. It's definitely big enough for all of that. It even has a large closet that would hold all of our movies and games. Plus, there's a 3/4 bath so people wouldn't be running up and down the stairs. And by people, I'm imagining Lily at 13 with a bunch of crazy girl friends. 'Cause boys aren't allowed. ;)

Anyway, back to reality. The above mentioned half is used for storage right now and the other half is our laundry room and more storage. Since Doug's closet isn't finished yet, he uses it for all of his clothes. And the boy has a bunch! Dress clothes, fun/regular clothes, gym clothes, seasonal clothing. Wowzers! So, those shirts are his and a little back story as to why they are next to the paint.

Speaking of paint, which is the main reason for this post, this house seems to be making paint cans out of thin air. Seriously. I know, I know, not possible. It's actually to be blamed on the previous homeowner and the fact that she left all the colors behind. Sounds nice, and yes, it was, but I hated about 99% of the colors and have since covered most of them. Three rooms to go (kitchen, front bedroom, basement). The problem with leaving them and me not wanting any of them is that I don't know what to do with paint! My trash man won't take it except for maybe one day of the year when they do their Spring Cleaning and I'm sick of them around. So... I'm organizing it.

All of the paint that I have bought and used throughout the house is pictured above. The other paint from her is being boxed up and some day I will figure out where to put/take it all. Two cans were empty so those suckers got thrown away without my trash man knowing about it. The rest is a waiting game.

But while cleaning the entire basement this week, I found those three containers. I put spray paint in one (and need to bring the rest down there), paint supplies (stripper, rollers, etc) in another, and the third currently houses one single outlet cover that isn't being used. Not even sure where it came from but it'll be basically the odds and ends from the house - hardware, stuff like that until I know I don't need it and then it'll be donated and/or thrown away.

The biggest news (cross your fingers, it hasn't physically happened yet) is that I have a guy coming to pick up the giant avocado green freezer tonight. I told him it's big so hopefully he's bringing some guys. I am NOT helping! I cleaned everything around it, behind it, and in its way out of my house so that it'll be as easy as possible to get the sucker out! After that happens, this girly is getting built in shelving for the basement! Woo to the hoo!

{Dining Room} Bye Bye Bi-fold

A couple years ago, my dad built us a custom made baby gate for our stairwell to the basement. We originally had a bi-fold door on there but after an attempt at keeping the dogs in the basement, Zoey found out that she could bust through them. She ended up breaking it and I wasn't upset at all. Those things are terribly ugly. But, once we had a crawling baby on our hands, we needed something. After an attempt at buying a pre-made one that ended up broken and messed up before we could do our own damage, we decided to do something more permanent. My dad had just finished making one for his stairwell due to the extra wide size of theirs. So, we decided to have the same thing. Here's what it looked like before I painted the walls and added some decoration (ps. this post shows the trim before I painted - with the wallpaper circles removed).

It's sad to say that we lived with the set up below for a long time. I don't know why but I guess we just weren't that bothered by it and we were into other projects at the time. But now that we're close to having a lot of people over, and how I'm trying to make the rest of the house look nice, it was time to deal with the situation. So I took it to one day. It was the same day I painted the hallway. I still am in love with the color.

As I was touching up the trim paint in other areas of the house, I knew I needed to deal with the horrible issue from the previous homeowner. You can see in the picture below with what I'm dealing with. The previous homeowner cut out circles from a patterned wallpaper and glued them (and then painted over them) on the trim in the dining room. I have since removed all of it, along with the border, but am left with rings of paint. I thought I had sanded down everything but this door frame is the last one to go. I should have sanded it down before the photograph but you can see just how much I've dealt with in this room (and house!). The photo below also shows the color of the dingy white trim vs the newly painted trim (if your monitors allow) and the fact that there were yellow spots in the trim from not being primed and so much more. Her (the previous homeowner's) painting skills were definitely lacking! She had creativity... I guess... but she had some issues when it came to paint. She would touch up items on with a different sheen of paint so you'll walk into a room and see a spot that sticks out. Flat on eggshell of vice versa. Just enough to be annoying!

Anywho... let's get to the pics. Here are the BEFORE shots... (or maybe in progress as Zoey took care of the actual true before shots with the door and all). Plus, if it was a true before shot the wallpaper would still be there and the walls would be dark red. Now I'm off to go find some of those photos...
What it looked like before the removal of the track.

You can see in the picture below where the hinges went for the door (that was removed for painting). There are there screw holes on top and three in the brown square towards the bottom. We had to remove the quarter round in order for the door to swing all the way open, allowing us and the dogs to get through without problems. Our laundry room is in the basment and it's nice to have the door open wide enough for baskets and us to fit through.
Part of the quarter round had to be removed when my dad installed his custom built baby gate for our stairs (to the basement).
Another shot of the whole set up.
Detailed view.

Here's what it looked like without the track. And yes, that's dark green paint underneath the white. Someone really liked green in the house before us. And there's a nail that's stuck. Either the head was broken off or it's somehow stuck in backwards (sharp side out). It's impossible to grab with a hammer and so it'll be a job for Doug to do when I get around to putting the second coat of white paint on. 
Underneath the door frame once the track was removed.

Stay tuned for the finished product. It needs another coat of paint, some sanding, and that nail to be removed. I've already reattached the door just for safety issues. I know Lily understands not to go to the basement without us but I'd hate for something to happen. I'm a worrier. 

LinkWithin

Related Posts Plugin for WordPress, Blogger...