Showing posts with label arts and crafts. Show all posts

{Christmas} DIY Ornaments


Are you in the decorating mood yet? I think I'm getting there! The more Christmas and holiday items I see out there on blogs and in stores makes me want to have Doug bring up the boxes and get started. I typically do not do anything until after Thanksgiving when we go chop down our tree (a yearly tradition except last year). 

But, before I go crazy decorating while on maternity leave, I figured I'd do a little ornament round up from the previous ornaments I've created. Some how I'm missing a few of the ones I've made with Lily, so hopefully I can get good photos of those this year while we make our yearly ornament. Plus, this year I will have to start one with Nate! 

Years ago, I created the crystal ornament "icicles" and gave them out to coworkers and friends. I kept quite a few, as once you buy the supplies, it's easy to make a lot. I think they add a great sparkle to the tree and are nice to tuck in here and there for a little shine. And, really, who doesn't like lots of sparkle on their Christmas tree?!?

The painted versions are made using either the clear glass or plastic ornaments from the craft stores and acrylic paint. You can see all of the other color versions here. I think I may make some more of those this year! 

The glitter ornaments were last year's creation and let me tell you, people LOVE them! I made a few for our yearly Christmas party at work and they were a hit. Plus, they are extremely easy to make and it doesn't take as much as glitter as you would think. I played around last year with different colors and will definitely add some more this year. Lily really liked them too because they are "sparkledy." 

In addition to those above, we've done hand and foot prints of Lily over the years. We tried salt dough but it didn't work out, plus her hand was too big. I think it'd be a great way for the first year ornament, but may be too big and heavy as kids get bigger. 
Partying at:
Not Just A Housewife

Seashell Mirror

A couple weeks ago I showed you this mirror that I wanted to makeover. After I chipped off the majority of the broken plaster, I spray painted the inside edge white (in case any of it showed) and started gluing on shells. I had 5 large shells (that are shown below) and one random red spiky shell (from an auction), so I glued those down first. They are all bigger than the rest, so I wanted to evenly space them out. I then went down in size, going to the medium size shells to balance out the mirror. Once they were glued down, I started with the rest. I finished up with the smallest shells and tucked in some where ever it was needed. I used probably close to 20 small glue sticks (why I ever bought the small glue gun is a mystery, it's annoying!). I did use hot glue as opposed to others. At first I was going to use the same glue I did on the DIY Bird Bath but between the smell and the fact that I was going to run out, I opted for hot glue.  

All of the shells are either from our trip to Florida or from Doug's grandmother's collection. I still have a lot left over so they went back in the glass vase I've had them in for years.
Don't mind the purple towel, I used it to keep the back of the mirror from scratching the table and floor while I worked.

The above shot is showing how I filled in some areas with smaller shells. I have one more thing to do before hanging it up and then I'll show you the final piece. It's a heavy, heavy mirror so I'm thinking it'll take extra support to hang it. But that's what the hubby's for, right?!

I'm thinking of hanging it upstairs. It'll hopefully brighten up the open stairwell and also it's one of the last big walls that needs something in our house. The colors of the shells go well with the other colors in the room (gray, tan, wood tone) and the wall needs something. Plus, it's not plaster like the entire first floor of the house, making it nearly impossible to hang some items!

Linking to:
Home Decorating DIY at Today's Creative Blog

Dyed Clothes Pins

After deciding to use the baby bed springs as a memo board (still undecided as to where it'll be, but most likely in Lily's room and/or for her art from daycare), I realized I would need to find something to attach the art to the box springs.

I thought about mod podging fabric/paper to one side but that would take away from Lily's art work. Then I found out about coloring clothes pins with dye. I was definitely not about going to go buy a bunch of fabric dye as I wanted this project to remain free/cheap.

Enter food coloring! Here's green...

And, although blurry, here's pink, purple and teal (I mixed blue and green).

Here's what to do:

Boil water in a pot. I chose stainless steel so it wouldn't stain anything and that's what I own. I boiled 6 cups - which was enough to cover the green clothes pins but you could do more or less. I was coloring maybe 25 at a time.

Add vinegar. Maybe a cup. It's not precise. I just poured a bunch in there. The other colors all had a variety of vinegar in there.

Then a few drops of color. I use Americolor, which I absolutely love.

Then wait. I let it boil a little bit, nothing major, and then let it sit. I started with 20-30 minutes but wanted a darker color, so I let it sit while I cleaned the house.

{Project} Baby Bed Springs

It seems that everyone around the internet has their version of this project, but I'm still doing it. My parents had my old baby bed (that I think was originally my older cousin's) and it was one of those "unsafe" for current sat in mstandards. It y dad's shop/garage for a long time and now it's been sitting in my basement. I have plans for the rest of the frame but didn't need the box springs for that, so I knew I needed to find another use. Enter the memo board idea. I'm not 100% sure as to where it'll eventually go, as I've thought of both Lily's room and my office. However, both have the majority of their walls filled or plans to fill them are in place. So I've also given thought to other rooms.

Anyway, I finally got around to spraying it. I went with my new favorite spray paint but need another container in order to finish it off. All of the springs, wires, and frame were sprayed. Isn't it pretty?

Shiny, black/dark gray metallic paint with just a bit of shimmer.
Half way done when I remembered to take a photo.
Rusty frame. I washed it and brushed off all the cobwebs, dirt and mulch (it was sitting in our newly mulched flower bed when I hosed it off).
Showing off at:

{Project} Bird Bath

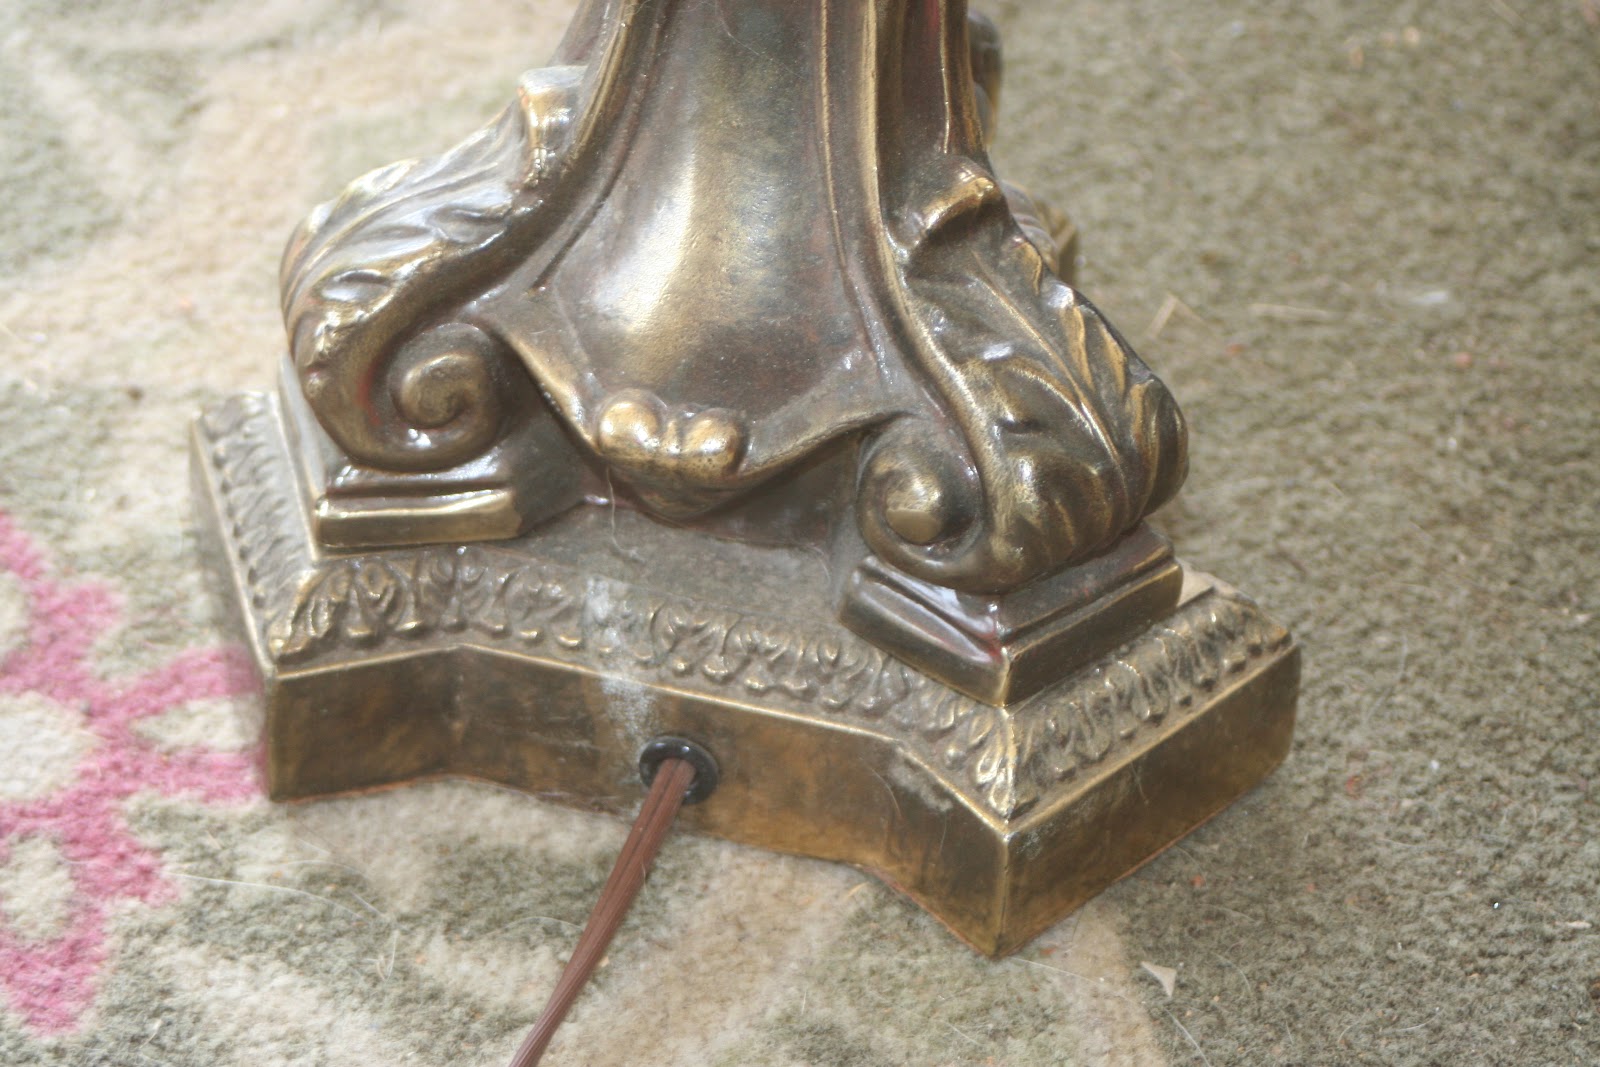
I was given this giant brass lamp when I moved into my first place alone. It was free and worked for the time being. Fast forward 8 years and we're in our house, trying to make it a home. This lamp hasn't been used in over 5 years and was sitting in our  junk room's closet. I donated the lamp shade to the local charity organization (our version of Good Will) and so I needed to find something to do with the base or it was going to be donated too.

Enter a new project - a couple days ago I saw someone take a lamp base and make into yard art. I figured I could do this and make either a bird bath or a bird feeder. I already have three bird feeders in the yard and although that's never enough for the neighborhood birds (I swear I'm the only one who feeds them!), I really didn't want another one. So I figured I'd make a bird bath. I don't have one yet and it would be nice addition to Lily's Garden.

So, I started with the base of the lamp. After a good cleaning, I was left with this in all of it's brassy goodness:

Before. Brass.
Before - brass, ugly, gigantic!
Underneath. I cut the wires with my kitchen sheers.
I knew I didn't need the wiring at all, so I cut it with my scissors. I did keep the lamp shade halo thing in case I need to exhange one on another lamp of mine. The brown felt on the bottom was nasty and I ripped it all off to expose the wire but also because I knew it would just get wet and possibly moldy if it was outside.
Now that I had the base ready, I needed to figure out what I was going to make the bowl with. At first I thought a ceramic plate from the garden center would work but they were out of the size I wanted. That ended up being a good thing becauase after "shopping" my home, I found this unused fountain base that I got for free when I was a freshman in college.
BEFORE! An old bowl from a table top fountain (that was free while at college) that was taking up shelf space in my basement.
Before - inside.

Here's the base all spray painted up... it's a gorgeous metallic color that's part ORB (oil rubbed bronze) and part glittery goodness. The spray paint and the glue are the only things I bought and I have plenty left over of both for future projects. 
Before the disk like shape was glued on (to help support the bowl).
Disk placement before glueing on the bowl.
Underneath. You can see a little bit of the glue dripping down. Ignore the window behind this... that's our basement and a horrible mess (and curtains from the previous homeowner).

And here it is! I'm letting the glue dry overnight before filling it up with water. I think the birdies will like it! 
In place behind the hydrangeas.

Just waiting for the glue to dry so I can fill it up with water. Don't you like the drift wood?
In place. You can kind of see a sneak peak of a future project in the top left corner.
DIY Show Off

{Project} Mirror Makeover

Last summer I went to an auction and found three big mirrors for less than $5 each. I think I paid $2 each. One was in great condition and is now sitting on our mantel. It's framed in a pretty wood. The second is framed in plastic and may get a paint makeover at some point but it's hanging up in Lily's room. The plastic color matched Lily's trim perfectly and she loves her mirror. The third is a completely different story.

The mirror was huge though and I could see potential. Really, though, how can you go wrong with a mirror for $2?!

Then the mirror sat in our junk room, waiting for it's makeover. I wasn't sure what to do but I knew that the frame was chippy and needed replaced or removed.

I chose to remove it. My chisel and hammer were all I needed. And some elbow grease. And time, but I had my buddies to help me... 
My model boy, Krypto

My girl Zoey.
See the cracks? Yeah... not pretty.


After I removed the two rows of broken stuff. What's left over was nearly impossible to remove and will be covered up!

Some stuff just wouldn't get off, but that's ok because it'll be covered up.
Stay tuned for the final project!

Showing off at:
A Glimpse Inside

LinkWithin

Related Posts Plugin for WordPress, Blogger...