Front Door, Day 3

Is it really just Day 3?!?! Maybe I forgot and didn't count right... it feels like it's been forever! The door is basically done, it needs some cleaning up around the windows and the edges but I'm not taking it off again, especially now that it's 3 digit weather here in Mid-MO! But, I am working on the door frame now. The below picture shows how large the caulk (and some other stuff) was between the door and the house bricks. It had started to crack really bad and hasn't taken much to get off. Luckily there's not a lot of that poop brown paint color on the bricks. There's some, but it could be a lot worse.
I'm not done but I think I'll stop for the day. Heat, chemicals, and no breeze is not a good combo. So here are the pictures...

Oh, and if you want, you can see Day 1 here, Day 2 (part 1) here and Day 2 (part 2) here. And here it is before I started.

Ugh... this side pisses me off. They stripped the board to place the wiring for the doorbell underneath the metal frame for the screened door. The board is basically ruined!
Random screw hole (probably from screen door) and all the layers of paint.
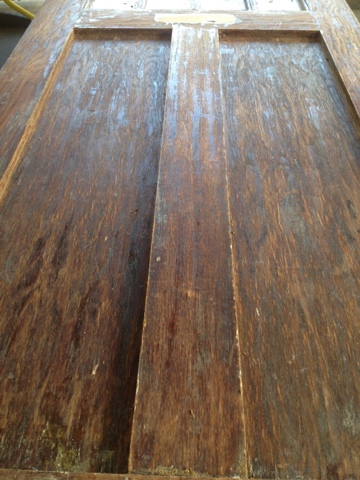
Pretty wood underneath 3+ layers of paint.
You can kind of see a groove in the wood (same piece as where the door hinge used to be, running vertically). It's a pain to clean out but I think it's a nice detail.

Seashell Mirror

A couple weeks ago I showed you this mirror that I wanted to makeover. After I chipped off the majority of the broken plaster, I spray painted the inside edge white (in case any of it showed) and started gluing on shells. I had 5 large shells (that are shown below) and one random red spiky shell (from an auction), so I glued those down first. They are all bigger than the rest, so I wanted to evenly space them out. I then went down in size, going to the medium size shells to balance out the mirror. Once they were glued down, I started with the rest. I finished up with the smallest shells and tucked in some where ever it was needed. I used probably close to 20 small glue sticks (why I ever bought the small glue gun is a mystery, it's annoying!). I did use hot glue as opposed to others. At first I was going to use the same glue I did on the DIY Bird Bath but between the smell and the fact that I was going to run out, I opted for hot glue.  

All of the shells are either from our trip to Florida or from Doug's grandmother's collection. I still have a lot left over so they went back in the glass vase I've had them in for years.
Don't mind the purple towel, I used it to keep the back of the mirror from scratching the table and floor while I worked.

The above shot is showing how I filled in some areas with smaller shells. I have one more thing to do before hanging it up and then I'll show you the final piece. It's a heavy, heavy mirror so I'm thinking it'll take extra support to hang it. But that's what the hubby's for, right?!

I'm thinking of hanging it upstairs. It'll hopefully brighten up the open stairwell and also it's one of the last big walls that needs something in our house. The colors of the shells go well with the other colors in the room (gray, tan, wood tone) and the wall needs something. Plus, it's not plaster like the entire first floor of the house, making it nearly impossible to hang some items!

Linking to:
Home Decorating DIY at Today's Creative Blog

Front Door Progress, Day 2 Part 2

It's getting closer!! I made a lot of progress on the door today but there is still a lot to go. However, it's back on its hinges and the hardware is back on so my house is safe again. And all in time for me to relax a bit before picking up Lily.

As with any home project, this one is going to most likely cause a snowball effect. The interior of the door now needs touched up (ok this needed it before but needs it more now), the door jam definitely needs help (no surprise), the threshold needs some TLC and what may be the biggest is that now I want to paint the front porch floor. It's currently a brick red that's in need of paint. It's always got dirt and pollen on it thanks to some neighboring trees. Instead of fighting the issue, I may go with the dirt color and paint the whole thing a gray/tan color. Griege? Maybe. We will see. After that though, I know we will want to paint the porch railing. And of course, there's our sidewalk that is crying out for help. Oh the joys of homeownership.

Anyway, I'm getting ahead of myself. Let's back up to the door....
This is why you wear gloves! My hand isn't even in the right glove and yet it's still stuck in that position.
GROSS! This is what I scraped off after I had most of the paint gone.
The grossness is worth it in the end because of this:


Full shot of the door. This is how I've left it.
There's a little bit of a story to the next photo. I just forgot to take a photo of it (although you can kind of see it from the full door shots). My dad told me that there was extra wood nailed to what's shown below. I'm assuming that it was for their screen door that they had here previous to us. Whatever the reason though it's gone. Now there's an even space around the whole door - see it? Yeah, it's tough. 
Isn't the beadboard ceiling nice? I've given thought to painting it a color. Maybe blue like my dining room?

Front Door Progress, Day 2 Part 1

Part 1....

If only someone was here to take photos of me while I tried to carry out a solid wood door. Ha!! For awhile, I was afraid I couldn't do it but I was so determined that I just had too. My determination met its match with a brand new bottle of stripper though, and the stripper won. But not the door!! Luckily I had another bottle that had already been open in our basement!

The door came off the hinges incredibly easy which was extremely helpful seeing as one side of the hinges is painted over and one is underneath some weather stripping.

I also took the hardware off. That was easy - just a few screws. Getting it back on should hopefully be just as easy. I have to get it all put back together before I can leave the house to pick up Lily!!

Anyway... Here is the door. It's almost done with the stripper. I'm letting it dry a little until I can tackle the paint some more. Most of it is done though!!!
Window detailed
More window detail. These little areas are tough to get!
More windows.
The hole is from the door knob hardware and the raised circle is from where I let the empty container of stripper sit (upside down) to drain out.
Underneath of the weather stripping piece on the bottom of the door.
Getting there!
All the paint is gone (well, for the most part, there's still some grossness in the window area)


And here's the door frame that I am also working on. Along with removing as much paint as possible (this part will all be repainted, not stained like the door), I am removing the caulk that helped sealed the area between the door frame and the brick walls of the house. 
The door frame and layers of paint.
Door frame - removing the old, cracked caulk that was attached to the door frame and bricks.

Door Progress, Day 1

I posted earlier that I was starting on the front door. Today saw a lot of progress!!! I'll let the pictures (and some captions) tell you the story. I hope to continue working on it tomorrow and Thursday. We have to go to Doug's grandmother's funeral Wednesday and will be visiting family that day.


That red is hard to get off!
I still have a ways to go....
Isn't that wood pretty???
The mail slot will be stained along with the rest of the door to help hide it and then we'll buy/make a sign to cover it up.
Part of the paint came off so easily!!
The red is gone! Well, most of it... if you look closely there's still a little.
More pretty wood grain!
The windows. On the bottom row, third from left, is set is slightly deeper than the rest. I had never noticed it until I was scraping the paint off. These windows are hard but are getting there!

Front Door Progress

I did it! I finally did it!

I started on the front door's makeover today! Last week I bought gel stripper and it is definitely the way to go! Look at all that ooey gooey goodness...


OK, so it's not all that pretty. The brownish paint (which is actually way more baby poop brownish yellow in person) is the main color on the door. The white is the base coat and that's all on top of a gorgeous wood door (the darker wood). That oval shape on the right is where the mail slot used to be but we sealed that sucker up last summer.

I was going to paint it. I even own the paint and it's been sitting under our armoire in the front room, basically right behind the door, for over a year now. But as my mom stood by me this morning and we watched the paint come right off, it showed a beautiful wood door. Soooo... I'm going to strip it and varnish it. It's too pretty to paint.

However, of course, there are some snags in this project. One, obviously, is the mail slot section. My mom came up with a great idea of buying a plaque, maybe with our last name on it, to hide it. I loved that idea and instantly thought of the vintage style metal ones that appear throughout Blog World.

Another snag is that the door bell wiring was hidden behind the metal frame from the old screen door. The screen door has never been there since we bought the house 5 years ago (almost!). That was a nice shocker this morning. So, we may get rid of the wired door bell anyway since I was going to have to buy a replacement since the original one was broken (I found that out while painting the hallway).

We do want to buy a screen door for this door to get some cross breeze when it's not 95 degrees outside, but Doug has a certain design in mind and we haven't been able to find it again. When we will, we'll snag that baby up as soon as possible. Or maybe we'll make it.

Issue #3 - the door frame is not the same wood. It's not liking the stripping process either. So it may be painted. Bringing me to the question of what color?

Issue #4 - we need to do something with the threshold. Again, we can paint it but what color? I have thought about painting it the same color as the door frame or the color of the porch floor, which I'd love to change from the chippy brick red color it's sporting currently. Decisions, decisions.

And that may be the only 4 issues I have with it... right now. I'm sure something will come up.

Anyway, break's over, back to stripping the paint off. I'm wearing gloves 'cause that stuff burns!

Happy Father's Day!!!

Happy Father's Day to my baby daddy! And also, to my own very wonderful Dad!!
Easter 2012, walking across the bridge to walk off some of breakfast!
Florida Vacation, Manatee Trip, December 2011

Uncle Gary's birthday party (with bluish teeth from a cake pop), November 2011
And some older ones...
May 2009 - just hours old

May 2009 - loved this photo as we finally  had chnaged her out of other onesies, it's just too bad we lost it in the shuffle home after the hospital visit


And one for my Dad! This isn't the best photo of these two but I love how he's just showing her stuff. She's in her swim suit and he's in pants... an odd beach combo but we had just made the trip and put her in it while the rest of us stayed in our normal clothes. 
Florida Vacation, December 2011

Holly

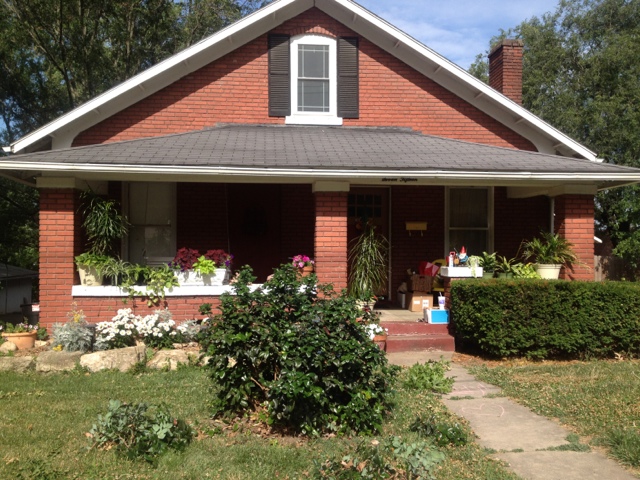
In our front yard we have a GIANT holly bush. It grows like crazy, it's gigantic, and it hurts to touch. Not to mention, it's not pretty:

Yesterday I had the clippers out cutting weeds and unwanted trees that had grown up in our other bushes and decided to clean up the holly some too.

And then I decided "why not cut it all off" and I basically did that and left the stump. The stump will be removed this summer (or next week if I want to pay a local landscaping company) and then our front yard will be ready for a new tree.

After I took this photo, a big wind gust came in and removed most of the oak leaves. They're from my neighbor's tree and cover our entire yard every year. They were hidden underneath all the new holly growth. It took three extra large trash bags fille dup to remove all the cut off limbs. I swear it was close to four feet tall!

Our yard previously had a large tree (maybe oak, probably elm) in the front yard and we've been left with the giant hole since we bought the house. We filled some of it with dirt but need to do more. I'd like to plant a new tree between the hole and the holly, centered on our front porch. It'll help block the view from our porch to our neighbor's house (a complete eyesore!) and be a nice touch in our front yard.

The other side of our front yard will remain untouched until we are ready to pour a new concrete sidewalk from the street to the house and possibly from there to the driveway. Then the two hedges will be removed and we'll work on the crappy walkway that's there. It's definitely a work in progress!!!!

Chalk

Lily found the container of sidewalk chalk the other day and decided we needed to go outside. Luckily, the temperature wasn't too bad and so we set off to color. We could have gone outside to our large patio but she wanted to go out the front and onto our driveway. Our driveway was made a very long time ago and it's really bumpy, not to mention full of cracks, but to a three year old, it's perfect!

And, of course, in true Lily fashion, it's done in style. Cowboy boots (with paint from when we went to a local art fair weeks ago that she doesn't want me to wash off), a pull up, and a shirt. No pants after daycare seems to be her motto lately. She'll come home and say "now can I take off my shorts?"


This one is great... she is a true girly girl almost all the time but the girl loves to get muddy and dirty too! She comes home daily with sand and dirt in her hair, all over her face and body, and now chalk.

Lily knows how to spell her name and we're working on writing it, so chalk makes for a great alternative to paper and crayons for her. Plus, while were in the middle of coloring outside, Daddy came home and he joined in on the fun!!

Dyed Clothes Pins

After deciding to use the baby bed springs as a memo board (still undecided as to where it'll be, but most likely in Lily's room and/or for her art from daycare), I realized I would need to find something to attach the art to the box springs.

I thought about mod podging fabric/paper to one side but that would take away from Lily's art work. Then I found out about coloring clothes pins with dye. I was definitely not about going to go buy a bunch of fabric dye as I wanted this project to remain free/cheap.

Enter food coloring! Here's green...

And, although blurry, here's pink, purple and teal (I mixed blue and green).

Here's what to do:

Boil water in a pot. I chose stainless steel so it wouldn't stain anything and that's what I own. I boiled 6 cups - which was enough to cover the green clothes pins but you could do more or less. I was coloring maybe 25 at a time.

Add vinegar. Maybe a cup. It's not precise. I just poured a bunch in there. The other colors all had a variety of vinegar in there.

Then a few drops of color. I use Americolor, which I absolutely love.

Then wait. I let it boil a little bit, nothing major, and then let it sit. I started with 20-30 minutes but wanted a darker color, so I let it sit while I cleaned the house.

Mission Organization


Ahh, organization. What a wonderful concept and something I'd love for my whole house to be some day. It's on its way there... slowly but surely.

Our basement, where this picture was taken, has two sections. One is what I would LOVE to redo some day for a nice entertainment room - TV, sectional, round table with chairs (game table/poker, etc) and even a bar area with a fridge and microwave. It's definitely big enough for all of that. It even has a large closet that would hold all of our movies and games. Plus, there's a 3/4 bath so people wouldn't be running up and down the stairs. And by people, I'm imagining Lily at 13 with a bunch of crazy girl friends. 'Cause boys aren't allowed. ;)

Anyway, back to reality. The above mentioned half is used for storage right now and the other half is our laundry room and more storage. Since Doug's closet isn't finished yet, he uses it for all of his clothes. And the boy has a bunch! Dress clothes, fun/regular clothes, gym clothes, seasonal clothing. Wowzers! So, those shirts are his and a little back story as to why they are next to the paint.

Speaking of paint, which is the main reason for this post, this house seems to be making paint cans out of thin air. Seriously. I know, I know, not possible. It's actually to be blamed on the previous homeowner and the fact that she left all the colors behind. Sounds nice, and yes, it was, but I hated about 99% of the colors and have since covered most of them. Three rooms to go (kitchen, front bedroom, basement). The problem with leaving them and me not wanting any of them is that I don't know what to do with paint! My trash man won't take it except for maybe one day of the year when they do their Spring Cleaning and I'm sick of them around. So... I'm organizing it.

All of the paint that I have bought and used throughout the house is pictured above. The other paint from her is being boxed up and some day I will figure out where to put/take it all. Two cans were empty so those suckers got thrown away without my trash man knowing about it. The rest is a waiting game.

But while cleaning the entire basement this week, I found those three containers. I put spray paint in one (and need to bring the rest down there), paint supplies (stripper, rollers, etc) in another, and the third currently houses one single outlet cover that isn't being used. Not even sure where it came from but it'll be basically the odds and ends from the house - hardware, stuff like that until I know I don't need it and then it'll be donated and/or thrown away.

The biggest news (cross your fingers, it hasn't physically happened yet) is that I have a guy coming to pick up the giant avocado green freezer tonight. I told him it's big so hopefully he's bringing some guys. I am NOT helping! I cleaned everything around it, behind it, and in its way out of my house so that it'll be as easy as possible to get the sucker out! After that happens, this girly is getting built in shelving for the basement! Woo to the hoo!

Happy Birthday, Mom!

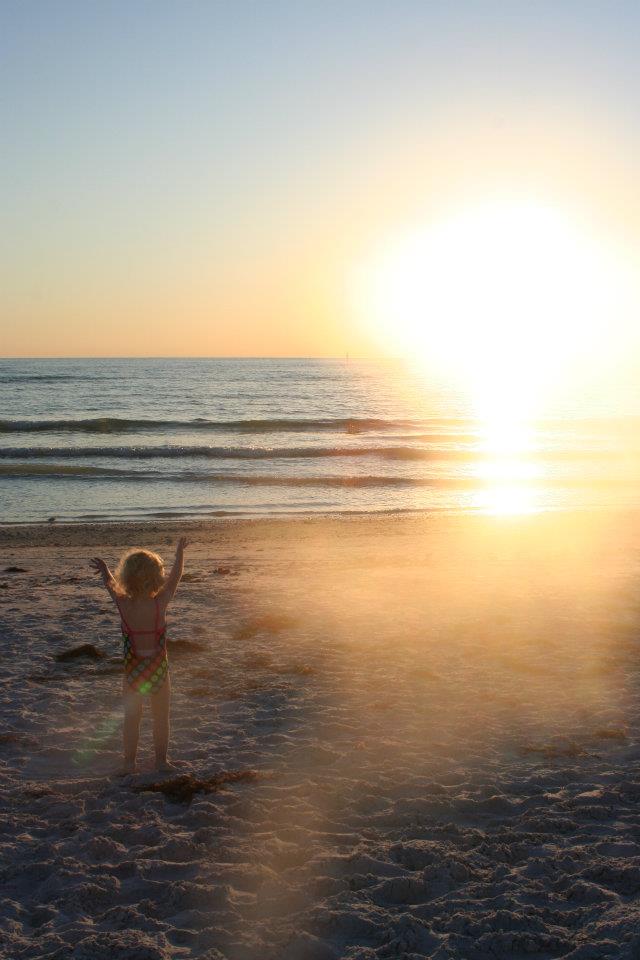
I love this photo! Lily was so happy! She still gets that excited about her "people" as she calls family and friends.

Enjoying the water... we look forward to this every year!

My mom's birthday last year as Lily walks with her favorite people.
Happy Birthday, Mom! I love you!

LinkWithin

Related Posts Plugin for WordPress, Blogger...